Auth0
Auth0 exposes SAML through the SAML2 Web App addon on an existing application, rather than as an app type of its own.
You need: Auth0 dashboard access.
1. In AuthSec
Identity Providers → + Add provider → SAML 2.0, then pick the Auth0 preset.
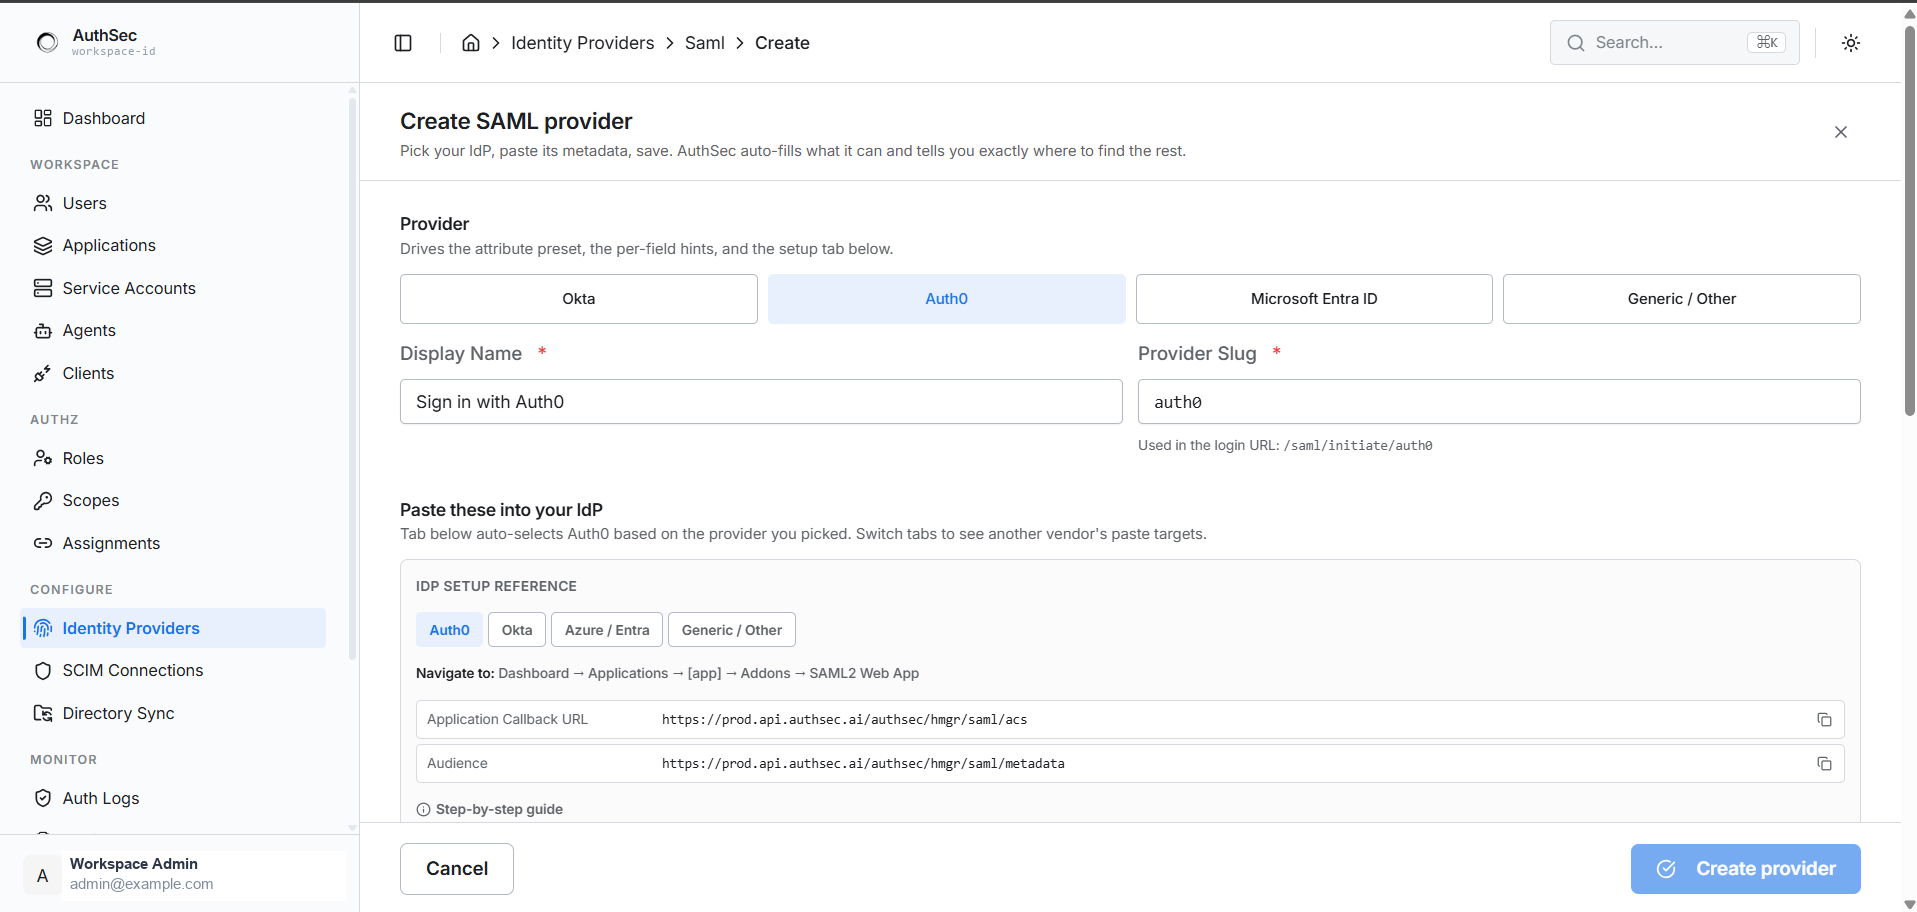
2. In Auth0
Navigate to Dashboard → Applications → [app] → Addons → SAML2 Web App.
| Auth0 field | Paste from AuthSec |
|---|---|
| Application Callback URL | Single sign-on URL |
| Audience | Audience URI (SP Entity ID) |
3. Paste the settings JSON
This is the part that makes Auth0 easier than most. AuthSec generates the entire Addon settings JSON — audience, recipient, destination, and the full attribute mapping — ready to paste into the addon's Settings box.
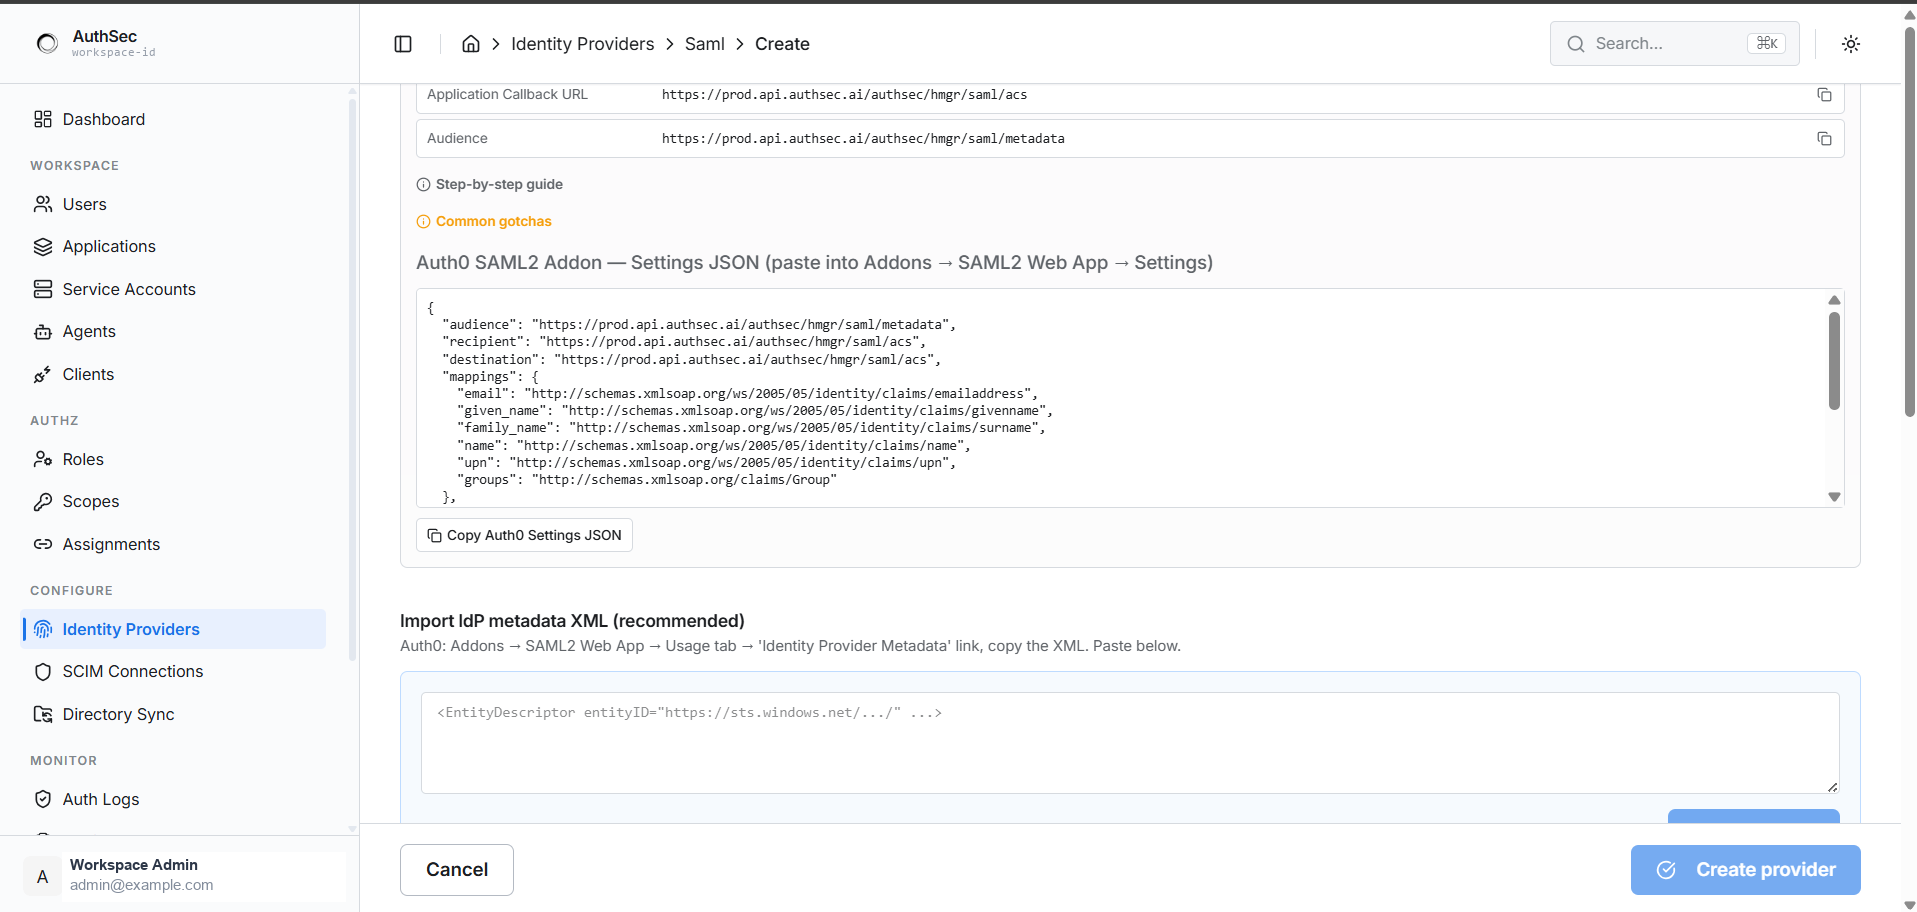
Click Copy Auth0 Settings JSON, paste it into Addons → SAML2 Web App → Settings, and save. That configures the mappings in one step instead of field by field.
4. Back in AuthSec
In Auth0, open the addon's Usage tab and copy the Identity Provider Metadata link. Paste the XML into Import IdP metadata XML and click Apply metadata.
To fill them manually:
| AuthSec field | Where in Auth0 |
|---|---|
| IdP Entity ID (Issuer) | Usage tab — urn:<your-tenant>.auth0.com |
| IdP SSO URL | Usage tab — Identity Provider Login URL |
| X.509 Signing Certificate | Usage tab — Download certificate, open the .pem in a text editor, paste the whole block |
Set Name ID Format to Email Address, then click Create provider.
Gotchas
- The addon must be enabled and saved. Toggling SAML2 Web App on without saving leaves the metadata URL dead.
- The certificate is a download, not a copy button. Open the
.pemin a text editor — do not paste the file path. - The Entity ID is a
urn:, not a URL. Auth0's issuer looks likeurn:example.auth0.com. That is correct; do not "fix" it intohttps://. - Enable the connections you want. Auth0 fronts other providers — whatever is enabled on that application is what your users will be offered.