Set up the environment and SDK
Time: ~5 minutes. Your application is registered — now connect your actual server to it: copy the credentials AuthSec generated, drop them into your environment, mount the SDK, run the server at the registered URL, and prove the protection is live.
Step 1 — Copy your credentials from the Setup tab
After Create and protect, you land on the application's detail page. The tabs across the top — Overview · Setup · Tools · Scopes · Roles · Access · Clients · Connections · Consent Grants · Test · Monitor — are mission control for this server. The Setup tab opens first:
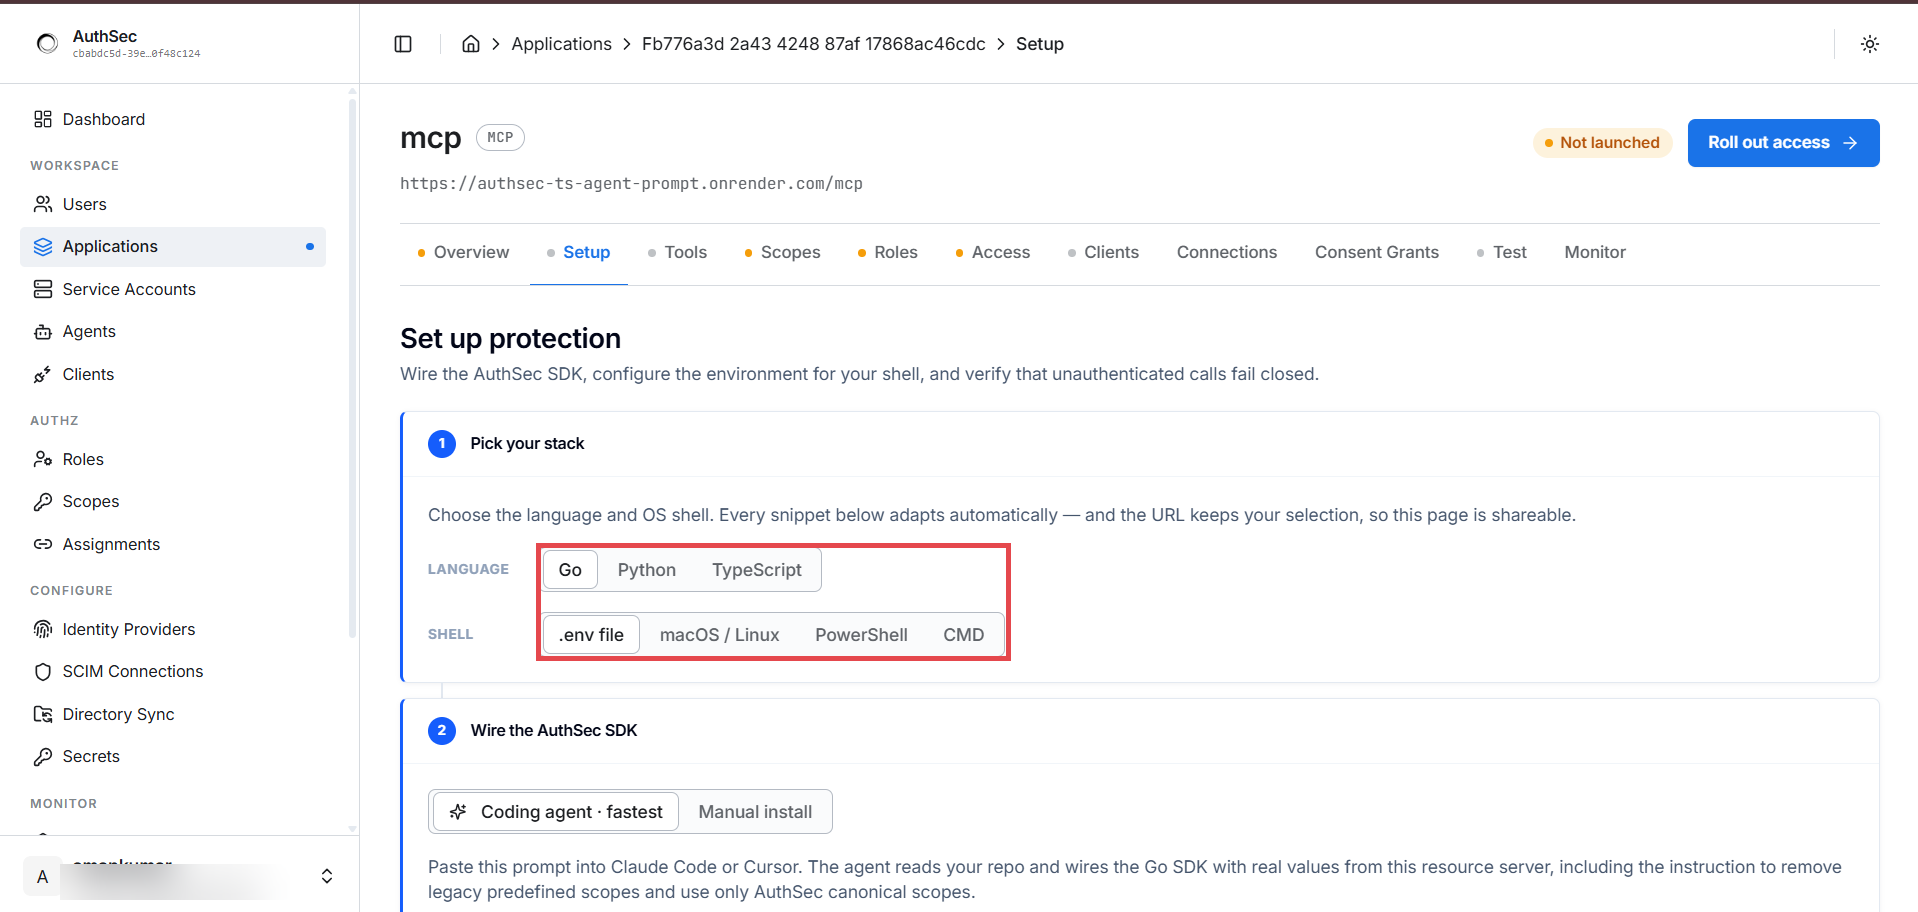
Pick your stack (e.g. Python + .env file) and the page renders copy-paste-ready environment values for this exact application:
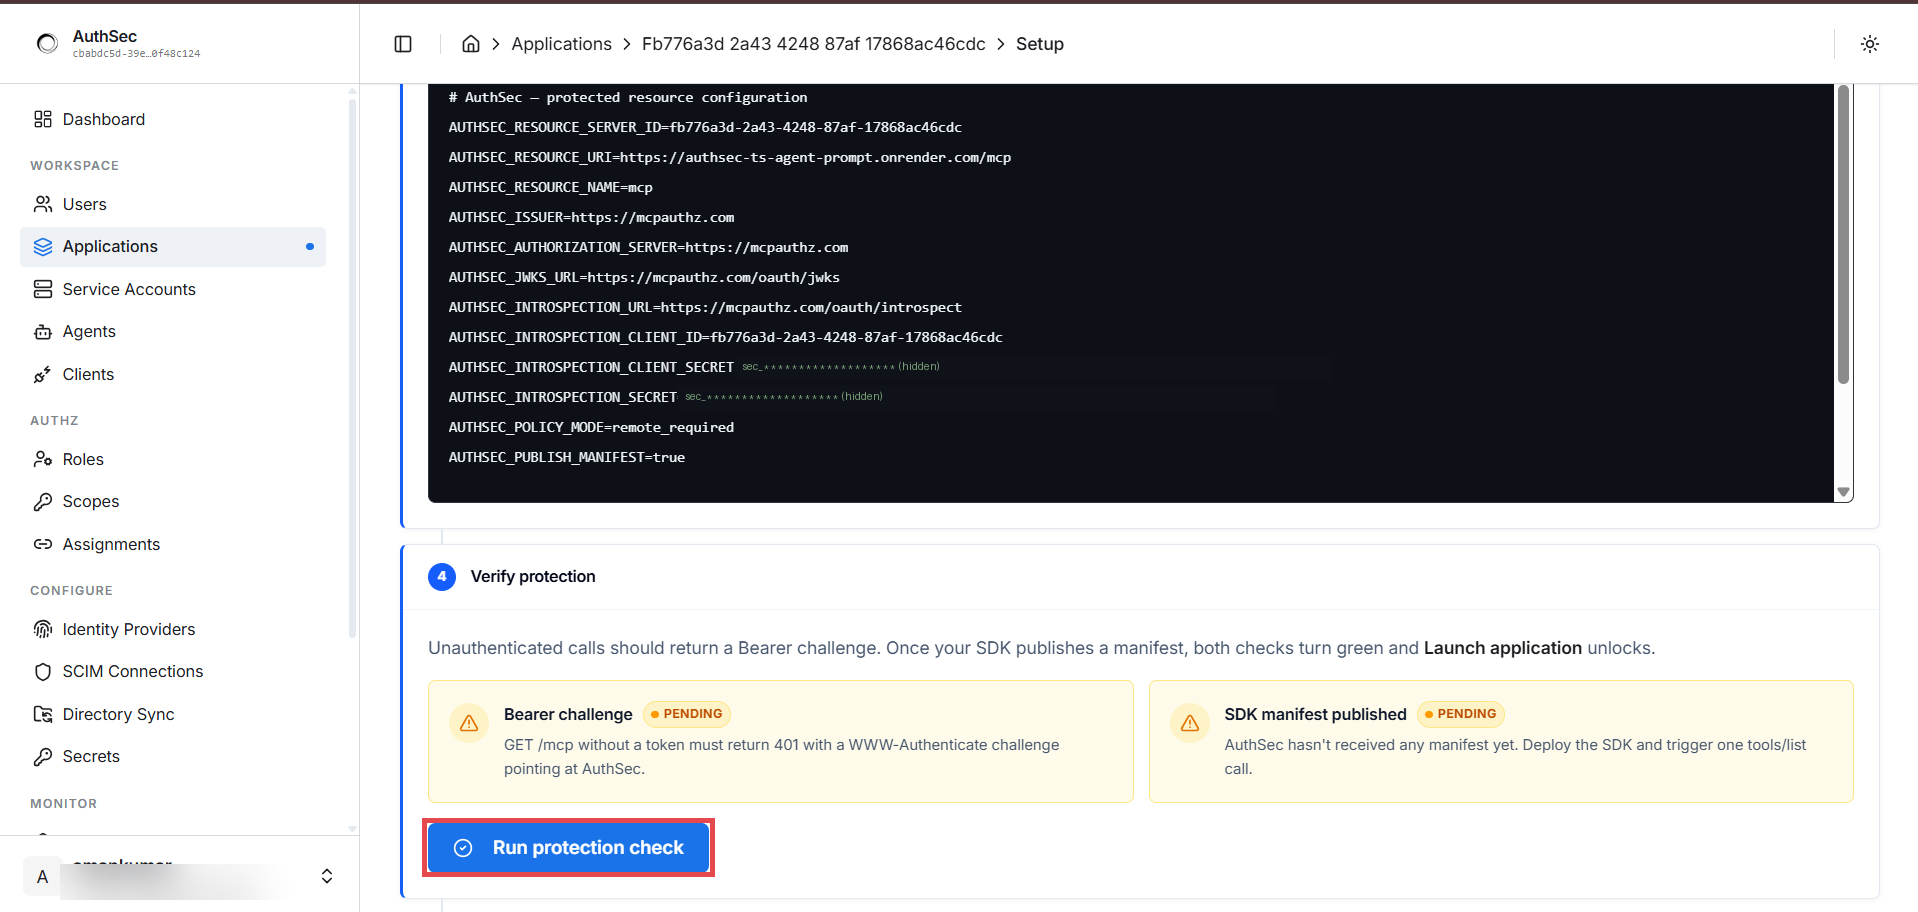
🔑 The introspection secret is shown once. Copy it now, store it as
AUTHSEC_INTROSPECTION_CLIENT_SECRET, and never commit it. If you lose it, hit Rotate secret on this same screen.
Note the Verify protection panel below the config — two checks
(Bearer challenge and SDK manifest published) sit at PENDING
until your server is running. The next page runs them.
Step 2 — Configure the environment
Paste the rendered block into a .env next to your server. The Setup tab
gives you the exact values; if you deploy through bash, PowerShell,
Docker, or Kubernetes instead, the same variables in every flavor are in
Environment setup.
Step 3 — Wire the SDK
Mount the SDK in your server's startup code:
# server.py
from fastapi import FastAPI
from mcp.server.fastmcp import FastMCP
from authsec_sdk import from_env, mount_mcp, ManifestTool
from dotenv import load_dotenv

mcp = FastMCP("my-server")

@mcp.tool()
def add_no(a: float, b: float) -> float:
    return a + b

@mcp.tool()
def multiply_no(a: float, b: float) -> float:
    return a * b

def my_tools():
    return [
        ManifestTool(
            name="add_no",
            description="Add two numbers",
            input_schema={
                "type": "object",
                "properties": {"a": {"type": "number"}, "b": {"type": "number"}},
                "required": ["a", "b"],
            },
        ),
        ManifestTool(
            name="multiply_no",
            description="Multiply two numbers",
            input_schema={
                "type": "object",
                "properties": {"a": {"type": "number"}, "b": {"type": "number"}},
                "required": ["a", "b"],
            },
        ),
    ]

load_dotenv()
cfg = from_env()                       # reads all AUTHSEC_* vars from step 2
cfg.tool_inventory_provider = my_tools # explicit manifest for the dashboard

app = FastAPI()
mount_mcp(app, "/mcp", mcp, cfg)       # ← the entire integration is this line
Full per-language guides: Python · Go · TypeScript.
Step 4 — Run the server
uvicorn server:app --host 0.0.0.0 --port 8000
Make sure it's reachable at the registered URL (see the warning at the bottom of this page). If your server isn't publicly routable yet, start a tunnel:
ngrok http 8000 # the https URL must match what you registered
At startup the SDK publishes your tool manifest to the dashboard — the
boot log shows authsec manifest published for resource_server_id=....
Step 5 — Quick check from your terminal
Two curls prove the SDK is live — it now serves the discovery metadata and challenges unauthenticated calls:
# RFC 9728 metadata (agents discover your server through this)
curl https://mcp.acme.example/.well-known/oauth-protected-resource/mcp

# unauthenticated calls get a 401 + WWW-Authenticate challenge
curl -i -X POST https://mcp.acme.example/mcp \
  -H "Content-Type: application/json" \
  -d '{"jsonrpc":"2.0","method":"tools/list","id":1}'
Your server must be reachable at the exact URL you registered — the Resource URI from registration (scheme, host, and path). Three things must be identical:
- the Public base URL + protected path you registered,
AUTHSEC_RESOURCE_URIin your environment,- the URL your server is actually deployed on.
Tokens are audience-bound to this URI, so any mismatch means every
request is rejected with invalid_audience — even with a perfectly valid
token. Moved hosts (or a rotated ngrok URL)? Update the application's base
URL in the dashboard and AUTHSEC_RESOURCE_URI, then restart.