Method C — Kubernetes / SPIFFE
When to use it
This is the strongest M2M method: there is no stored credential at all. No secret to leak, no keypair to rotate. Instead, the SPIRE agent running on the Kubernetes node attests your pod (verifies it really is the workload it claims to be, using kubelet + node attestation) and issues it a short-lived (~5 minute) JWT-SVID. AuthSec verifies that SVID against the trust domain you registered. Identity comes from the platform, not from a secret you manage.
Use it for any workload running under SPIRE. It requires SPIRE in your cluster and a one-time trust registration; in return you get credential-free auth with automatic, short-lived rotation. See the comparison.
How it works
your pod ──(unix socket)──▶ SPIRE agent ──▶ JWT-SVID (~5 min, aud = token endpoint)
   │                                              │
   └── SpiffeWorkloadIdentity sends the SVID as ──┘
       a client_assertion at the token endpoint
                    │
                    ▼
   AuthSec verifies the SVID against your trust domain's OIDC
   discovery (the "workload identity provider") and its SPIFFE-ID
   registration, then issues a scoped access token.
SpiffeWorkloadIdentity.AccessFor(ctx) runs the whole sequence
(spiffe.go):
- Resolve the token endpoint from
MCPServerURL(RFC 9728 PRM → RFC 8414 AS metadata), unless you setTokenEndpointexplicitly. This endpoint is also the audience the SVID must be minted for. - Fetch a JWT-SVID from the local SPIRE agent by shelling out to
spire-agent api fetch jwt -audience <token_endpoint> -socketPath <socket>. The-audienceis exactly the token endpoint — this is why the audience must match. - Exchange the SVID at the token endpoint:
grant_type=client_credentials,client_assertion_type=urn:authsec:params:oauth:client-assertion-type:spiffe-svid,client_assertion=<svid>,resource=<MCPServerURL>,scope=<Scopes>. - Cache both: the SVID for ~4.5 min (refreshed before its ~5-min expiry), the access token until 60 s before its expiry.
Setup is three parts: your cluster (once), the trust registration (once), and the workload connection (per app).
Cluster side — SPIRE (once per cluster)
You need a running SPIRE deployment with:
- SPIRE server + agents — the standard SPIRE quickstart.
- A registration entry mapping your pod's selectors to a SPIFFE ID:
spire-server entry create \
  -spiffeID spiffe://your-trust-domain/your-workload \
  -parentID spiffe://your-trust-domain/spire-agent \
-selector k8s:ns:default -selector k8s:sa:your-service-account - The OIDC discovery endpoint exposed (spire-oidc-discovery-provider) — a public URL where AuthSec fetches your trust domain's public keys. This URL becomes the Issuer URL in the next step.
- The agent socket mounted into your workload pod — the SDK reads SVIDs
from the SPIRE agent's unix socket:
volumes:
  - name: spire-agent-socket
    hostPath: { path: /run/spire/sockets, type: Directory }
containers:
  - name: your-app
    volumeMounts:
      - name: spire-agent-socket
        mountPath: /run/spire/sockets
        readOnly: true
Setting up SPIRE itself (server, agents, node attestation) is standard SPIFFE infrastructure — follow the official quickstart. This guide covers only the AuthSec-specific parts.
Register the trust domain (dashboard, once)
Sidebar → Trusted Issuers → Workload identity providers → + Add provider:

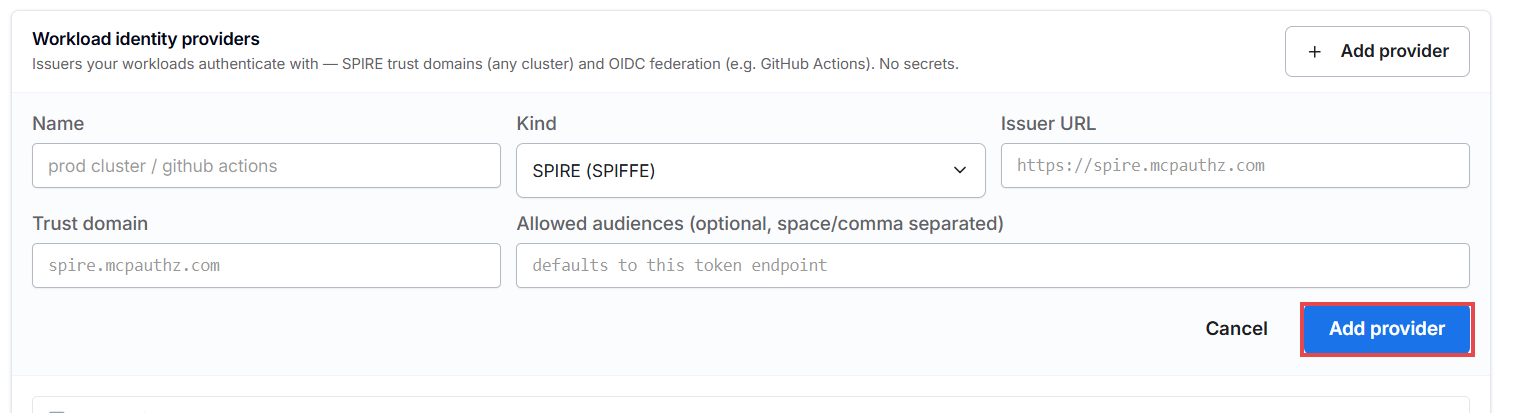
- Name — a label, e.g.
prod-spire. - Kind —
SPIRE (SPIFFE). - Issuer URL — your SPIRE OIDC discovery URL from cluster step 3. This is
how AuthSec fetches the keys to verify SVIDs (
jwks_unconfigurederrors mean this is wrong or unreachable). - Trust domain — your SPIFFE trust domain (e.g.
authsec.local). - Allowed audiences — leave empty: it defaults to this token endpoint, which is exactly what SVIDs must be minted for.
Connect the workload to your MCP app (per app)
Open your application → Access tab → Add access → Kubernetes workload, no secret:
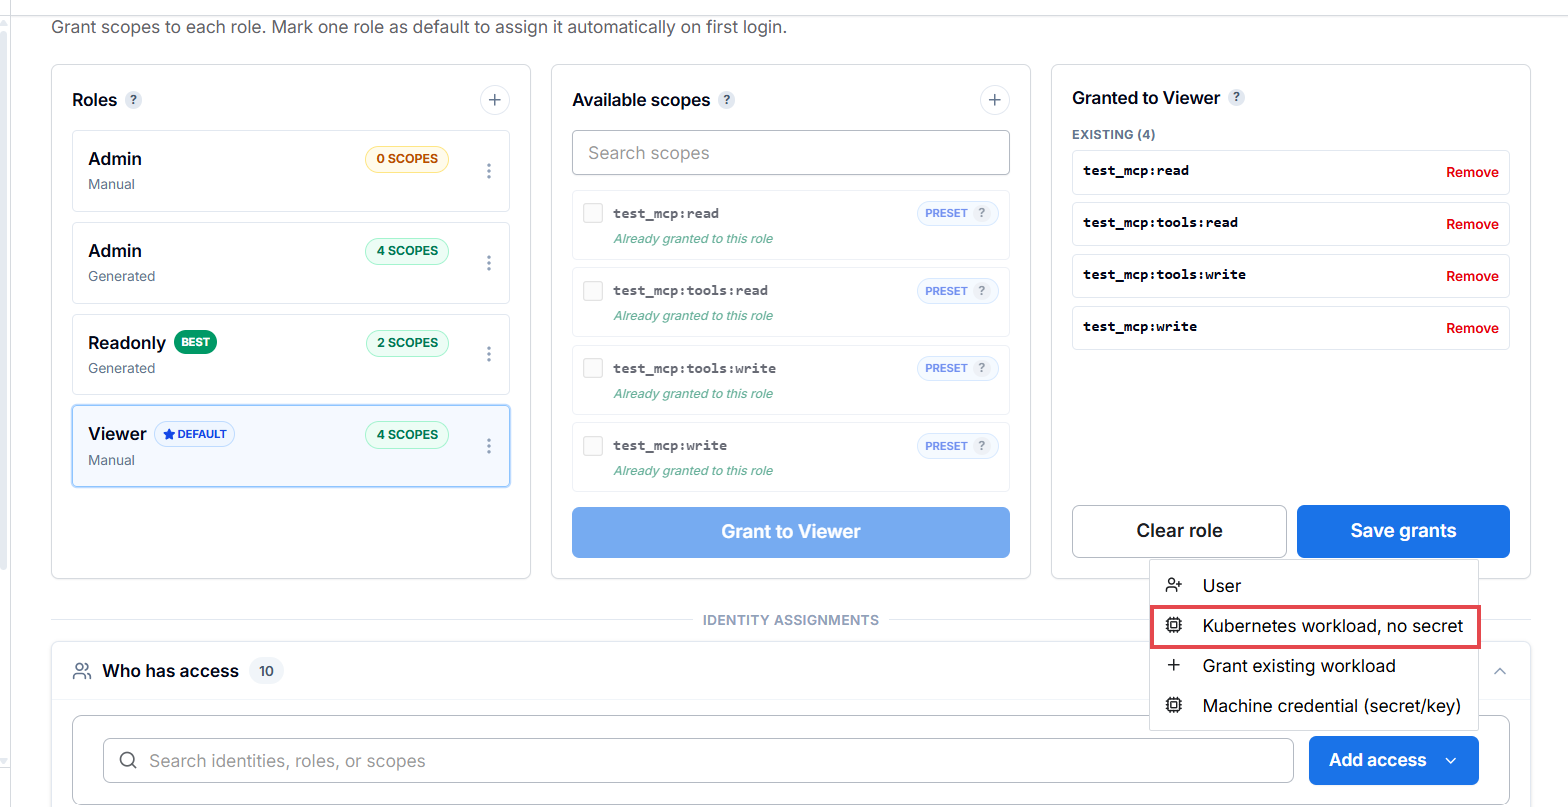
A four-step wizard opens:
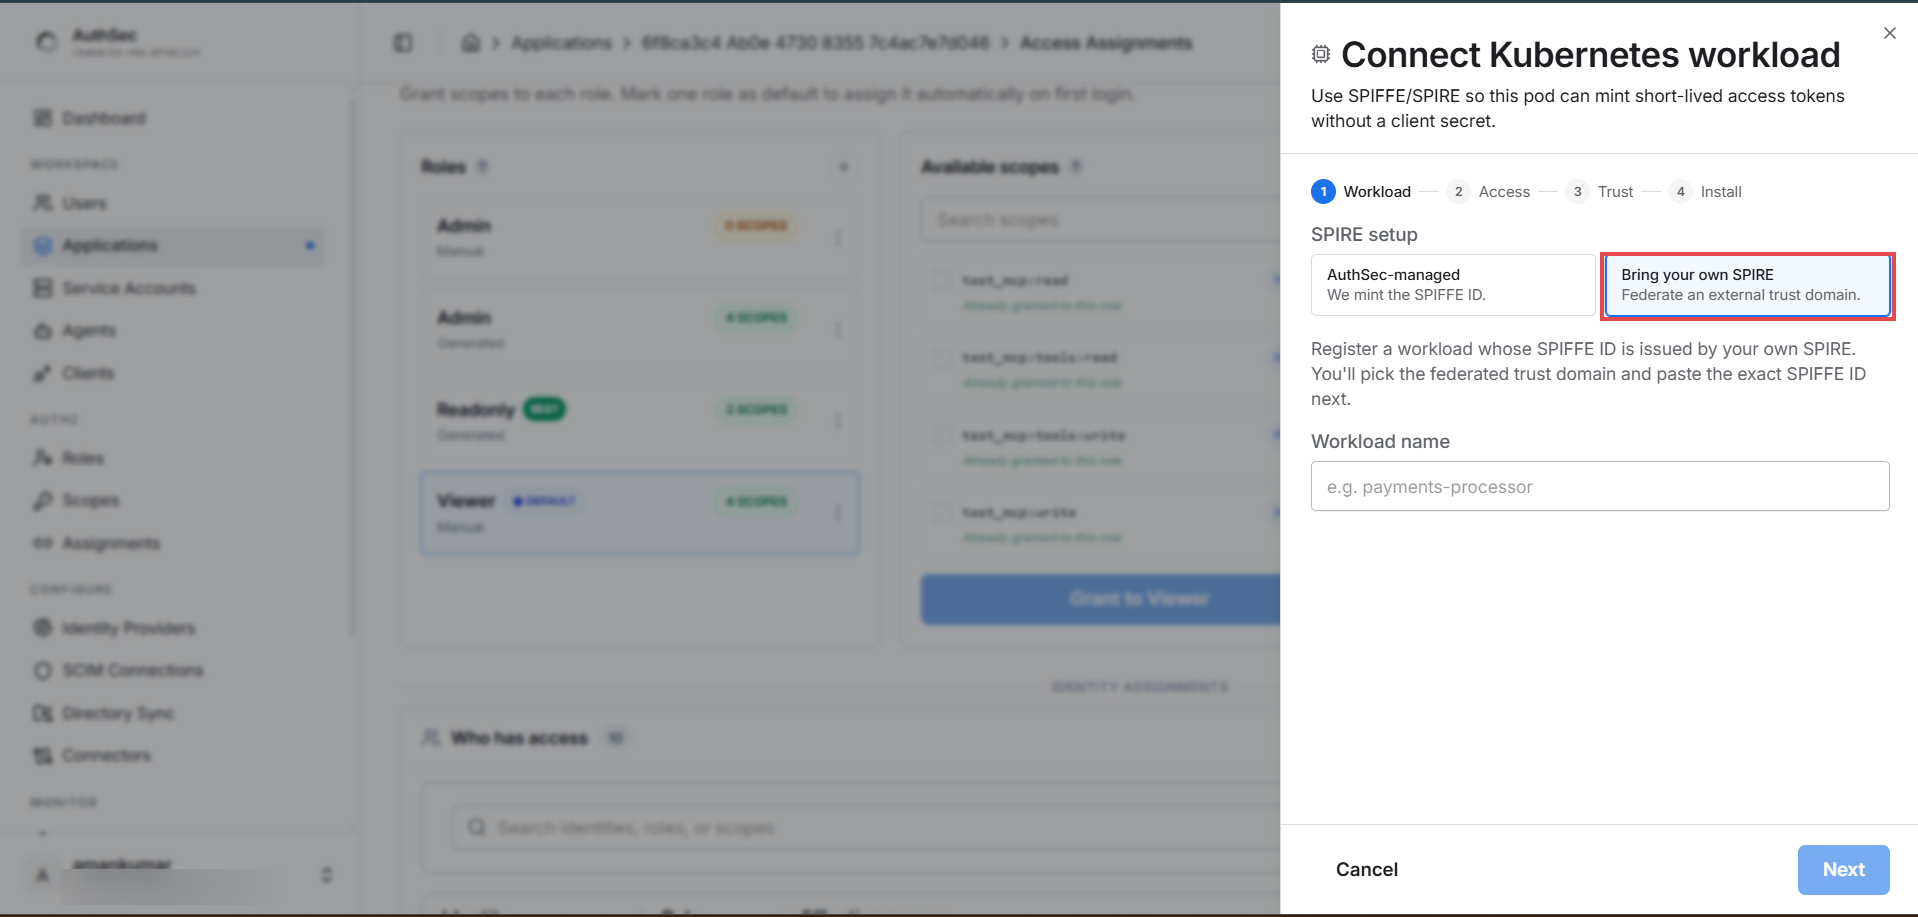
Step 1 — Workload. Choose AuthSec-managed (AuthSec mints the SPIFFE ID) or Bring your own SPIRE (federate the trust domain you registered), and name the workload:
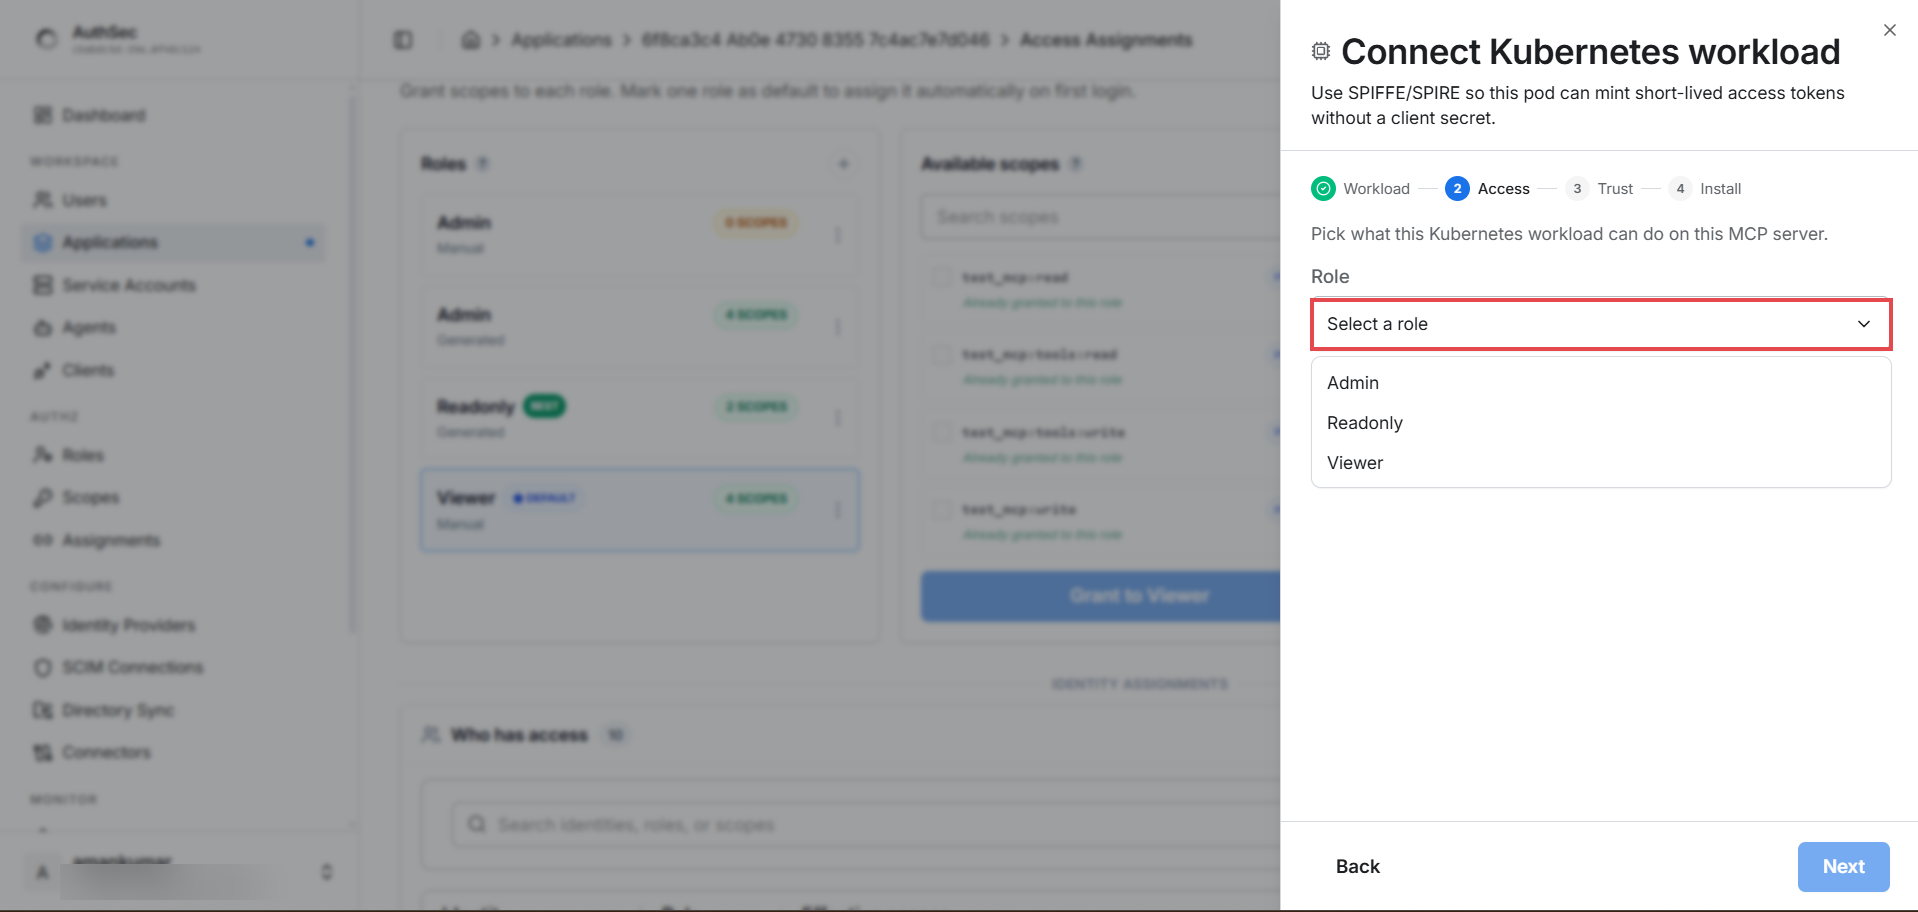
Step 2 — Access. Pick the role this workload gets on the MCP server (the roles from Protect your MCP server):
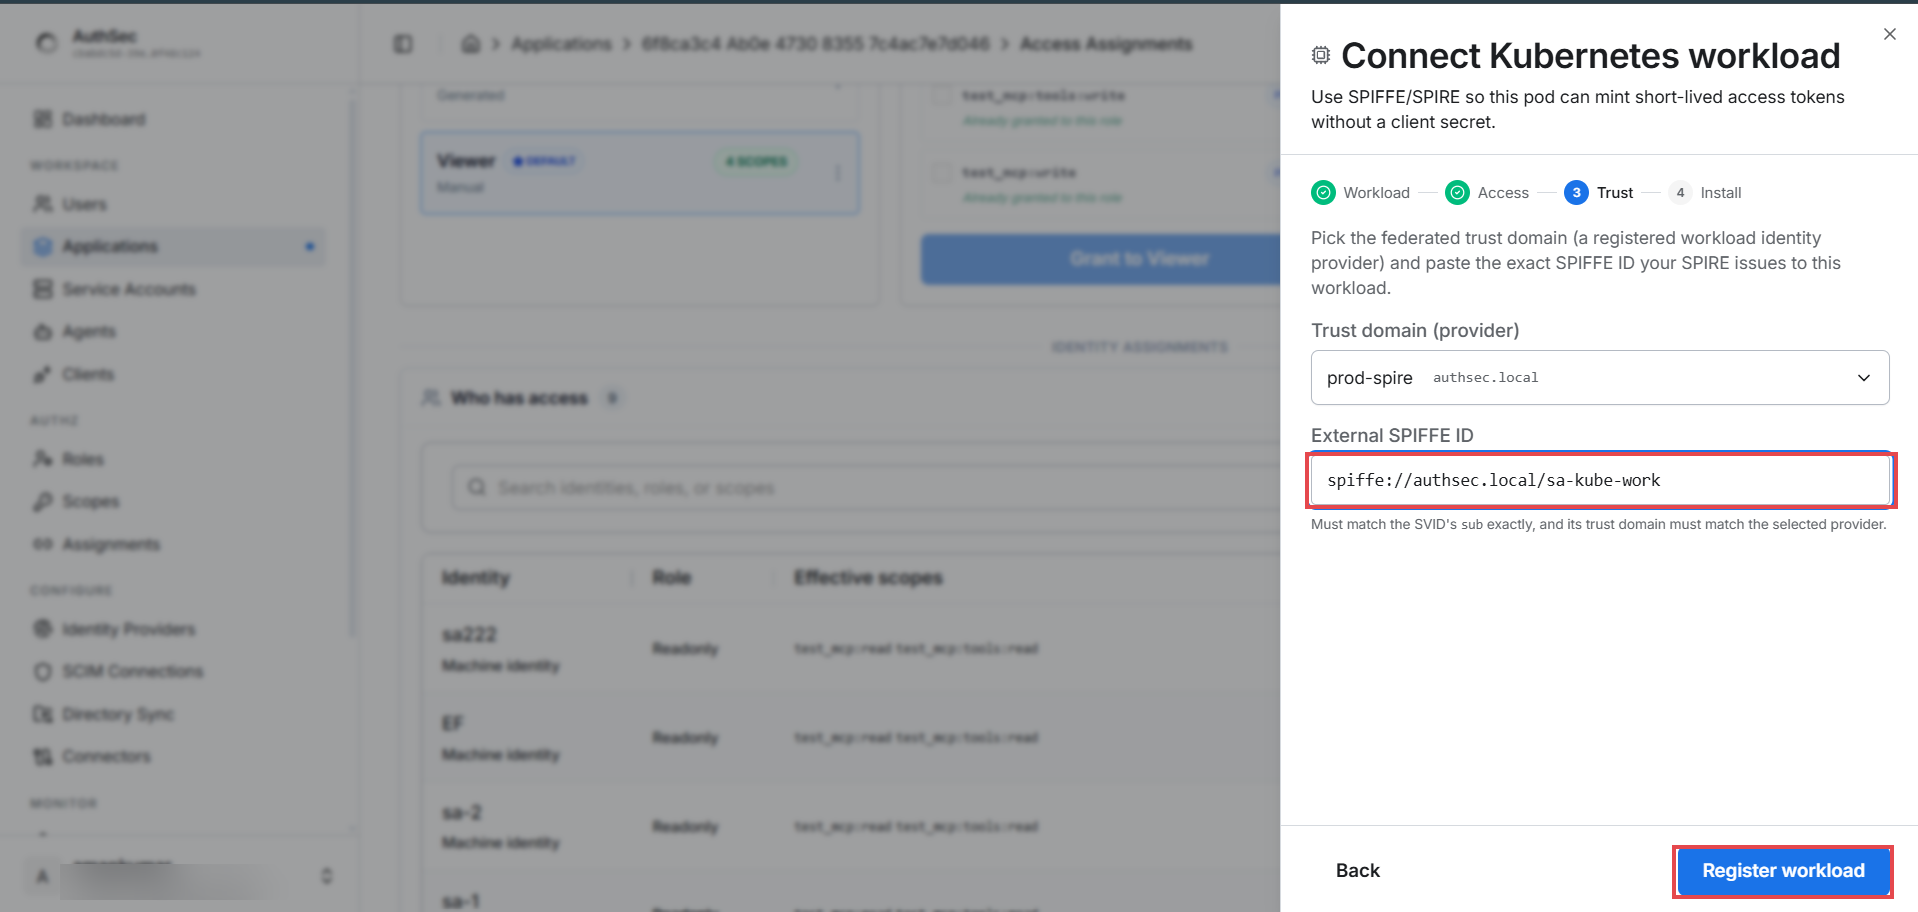
Step 3 — Trust. Select your registered provider (e.g.
prod-spire · authsec.local) and paste the exact SPIFFE ID from your
registration entry (format: spiffe://your-trust-domain/ns/prod/sa/api). It
must match the SVID's sub exactly, and its trust domain must match the
provider. Click Register workload:
Step 4 — Install. Confirmation and the values you need in code:
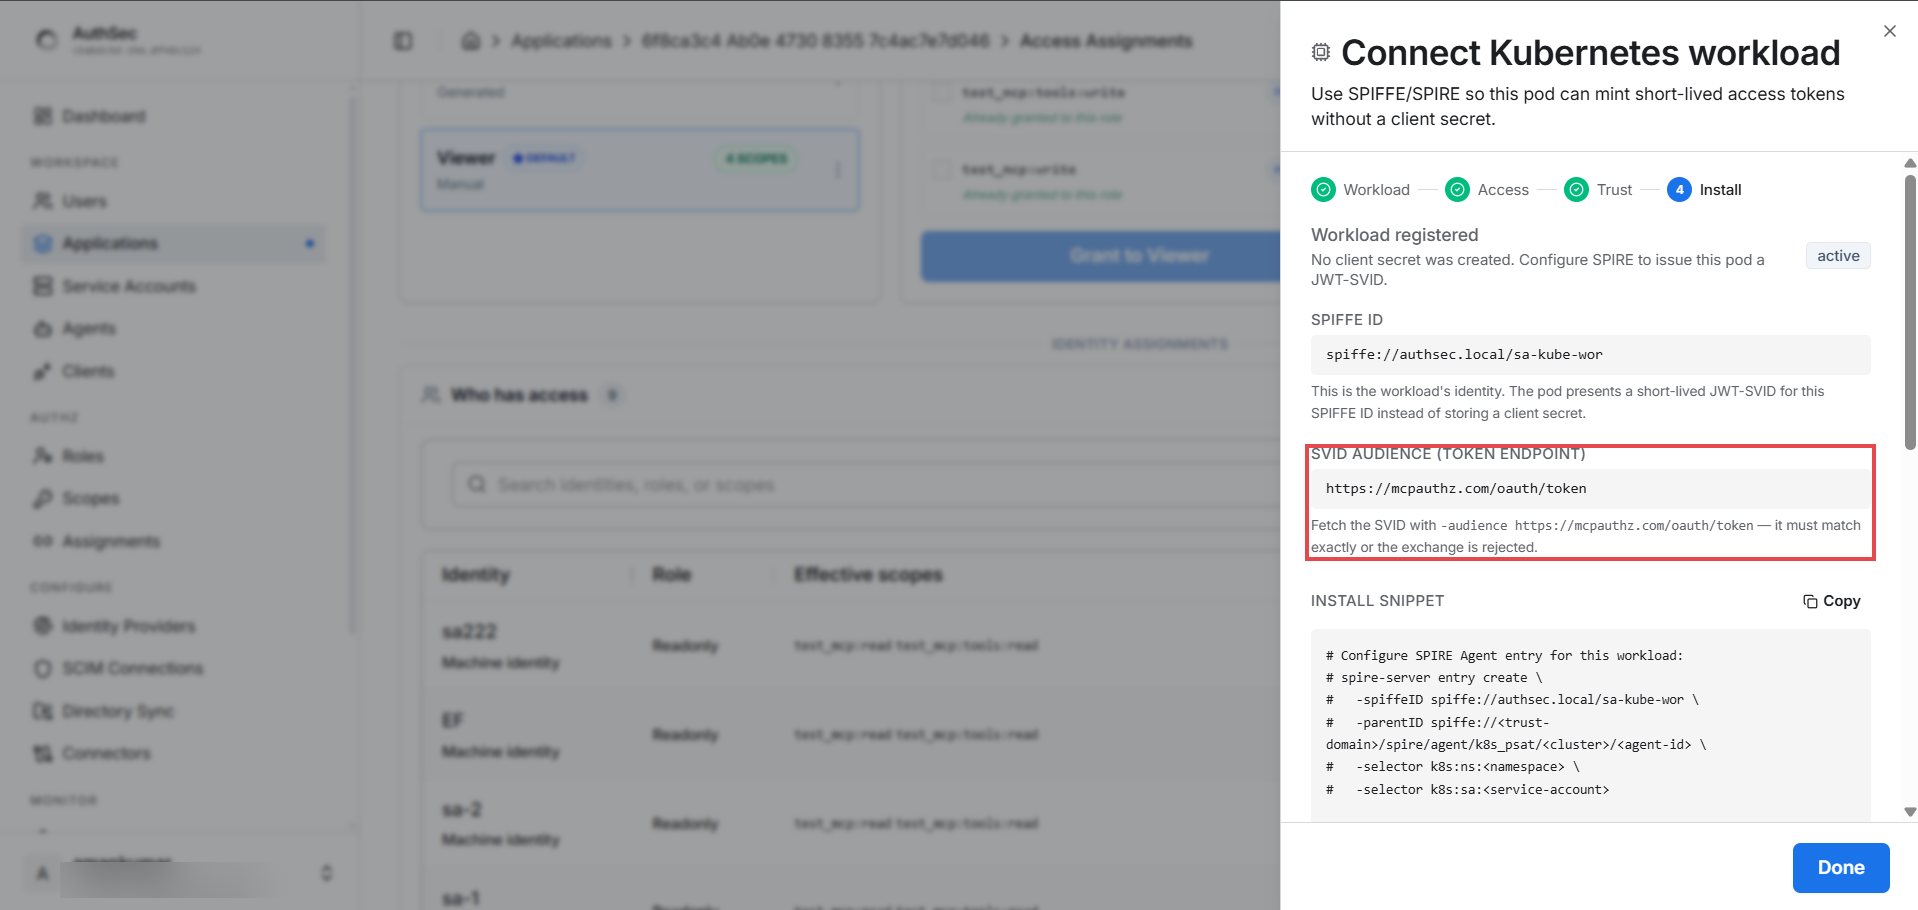
- SPIFFE ID — the workload's identity; the pod presents a short-lived SVID
for this ID instead of storing a secret. This is
SpiffeIDin your config. - CLIENT ID — the workload client id; this is
ClientIDin your config. - SVID AUDIENCE (TOKEN ENDPOINT) — the dashboard states the rule: "Fetch
the SVID with
-audience https://mcpauthz.com/oauth/token— it must match exactly or the exchange is rejected."SpiffeWorkloadIdentityhandles this automatically (it fetches with-audience <resolved token endpoint>). - INSTALL SNIPPET — a ready-made
spire-server entry createcommand.
Click Done — the workload appears in the app's Who has access list as a Machine identity with its role and scopes.
The code
Inside the pod, the SDK fetches and renews SVIDs for you:
import authsec "github.com/authsec-ai/sdk-authsec/packages/go-sdk"

workload, err := authsec.NewSpiffeWorkloadIdentity(authsec.SpiffeConfig{
	MCPServerURL: "https://your-mcp-server.example.com/mcp",
	ClientID:     "YOUR_SPIFFE_CLIENT_ID",              // from step 4 (Install)
	SpiffeID:     "spiffe://your-domain/your-workload", // must match the SVID's sub
	Scopes:       "test_mcp:read",                      // SPACE-separated string
	// AgentSocketPath defaults to /run/spire/sockets/agent.sock
})
if err != nil {
	log.Fatal(err)
}
token, err := workload.AccessFor(ctx)                    // no resource/scope args
SpiffeConfig, field by field:
MCPServerURL(required) — the protected MCP resource. The token endpoint is discovered from it, and the token's audience is bound to it.ClientID(required) — the workload client id from the wizard.SpiffeID(required) — must start withspiffe://and match the SVID'ssubexactly (the constructor rejects anything else).Scopes(required) — a space-separated string (Go-specific), e.g."test_mcp:read test_mcp:tools:read"— not a slice.TokenEndpoint(optional) — override discovery. If set it must behttps://. Leave empty to discover fromMCPServerURL.AgentSocketPath(optional) — the SPIRE agent socket, default/run/spire/sockets/agent.sock. The constructor checks the socket exists (unlessSvidOverrideis set) so a missing mount fails at startup, not mid-request.SvidOverride(optional) — a pre-minted JWT-SVID; when set, the SDK skips thespire-agentsubprocess entirely. Use it to test outside a pod.
Two Go-specific behaviors worth internalizing:
AccessFor(ctx)takes no arguments — the target (MCPServerURL) and scopes (Scopes) are fixed in the config, unlike theAgentIdentity.AccessForused by the other methods.- Caching: the access token is served while >60 s remain; the SVID is cached
~4.5 min and re-fetched from the agent when stale.
ClearCache()drops both — call it after an MCP-server401, thenAccessForagain (retry once).
Error codes — each one tells you what to fix
Errors are typed. *SpiffeSvidFetchError means the SDK couldn't get an SVID
from the agent (socket missing, workload not attested, timeout).
*SpiffeTokenExchangeError means AuthSec rejected the SVID — and its Code
pinpoints why:
Code | Meaning | Fix |
|---|---|---|
jwks_unconfigured | AuthSec can't verify the SVID's signature | Check the provider's Issuer URL / OIDC discovery is reachable |
spiffe_id_not_registered | No active service account for this SPIFFE ID | Complete the Connect-workload wizard (step 3) |
audience_mismatch | SVID aud isn't the token endpoint | Mint with -audience <token endpoint> exactly (the SDK does this) |
trust_domain_mismatch | SVID trust domain ≠ the provider's | Check the provider's trust domain |
no_scopes_granted | No role/scopes for this workload on this app | Assign a role in step 2 (or the Access tab) |
client_id_missing | client_id absent from the request | Set SpiffeConfig.ClientID |
Match them with errors.As:
token, err := workload.AccessFor(ctx)
var exch *authsec.SpiffeTokenExchangeError
if errors.As(err, &exch) {
	log.Fatalf("SPIFFE exchange rejected [%s]: %s", exch.Code, exch.Message)
}
Already hold an SVID? The low-level path
If you've minted an SVID yourself (e.g. for a test outside a pod), use the
SpiffeSvidAuth credential with a normal AgentIdentity — but mind two
hard-won rules:
agent := authsec.NewAgentIdentity(authsec.AgentIdentityConfig{
	Issuer: ISSUER, ClientID: SPIFFE_CLIENT_ID, Auth: authsec.NewSpiffeSvidAuth(svid),
})
token, err := agent.AccessFor(ctx, MCP_URL, authsec.WithRequestedScopes("test_mcp:read"))
- The SVID's audience must be the token endpoint (
https://…/oauth/token). An SVID minted with just the issuer as audience is rejected with "token aud must include this token endpoint". (This is why the provider's "Allowed audiences" default is correct.) - SVIDs live ~5 minutes and
SpiffeSvidAuthdoes not refresh them — mint immediately before use. For automatic fetch + renewal, useSpiffeWorkloadIdentity(above).
For a hands-off test outside a pod, set SpiffeConfig.SvidOverride to a JWT-SVID
string — it bypasses the SPIRE agent subprocess.
Shared steps: grant access · verify · troubleshooting