AutoGen SDK — Agent delegation
Before you write any code, two things need to exist in the AuthSec UI: an AI Agent client (gives your agent an identity) and a trust delegation (declares what that agent is allowed to do). Only then does the SDK have something to talk to.
Step 1 — Register the AI Agent
-
In the sidebar, go to Clients → MCP Servers / AI Agents.
-
Click Onboard New Client.
-
In the modal, select AI Agent.
-
Enter an AI Agent Name (e.g.,
Customer Support). -
Choose the Platform your agent runs on (e.g., Kubernetes).
-
Fill in the platform selectors that identify the workload at runtime:
Key Example value k8s:nsproductionk8s:sacustomer-support-sak8s:pod-label:appcustomer-supportk8s:container-nameagent -
Click + Onboard.
After onboarding, the client detail page shows the Client ID — copy it. You'll set it as AUTHSEC_AGENT_CLIENT_ID in your environment.
Step 2 — Create a trust delegation
Trust delegation tells AuthSec which roles and actions the agent may request tokens for.
- In the sidebar, click Trust Delegation.
- Click Create trust delegation.
- Define context:
- Set the Role the delegation applies to.
- Set Target Type to AutoGen AI agent.
- Under Client / Application, select the agent you just registered.
- Assign permissions: choose the Allowed Actions the agent can perform. You can select individual actions or use Select All.
- Set duration: enter a Maximum Duration and unit (e.g.,
1 Hour). Use the shortest window that fits your use case. - Click Create Trust Delegation. A successful save returns you to the Trust Delegation dashboard.
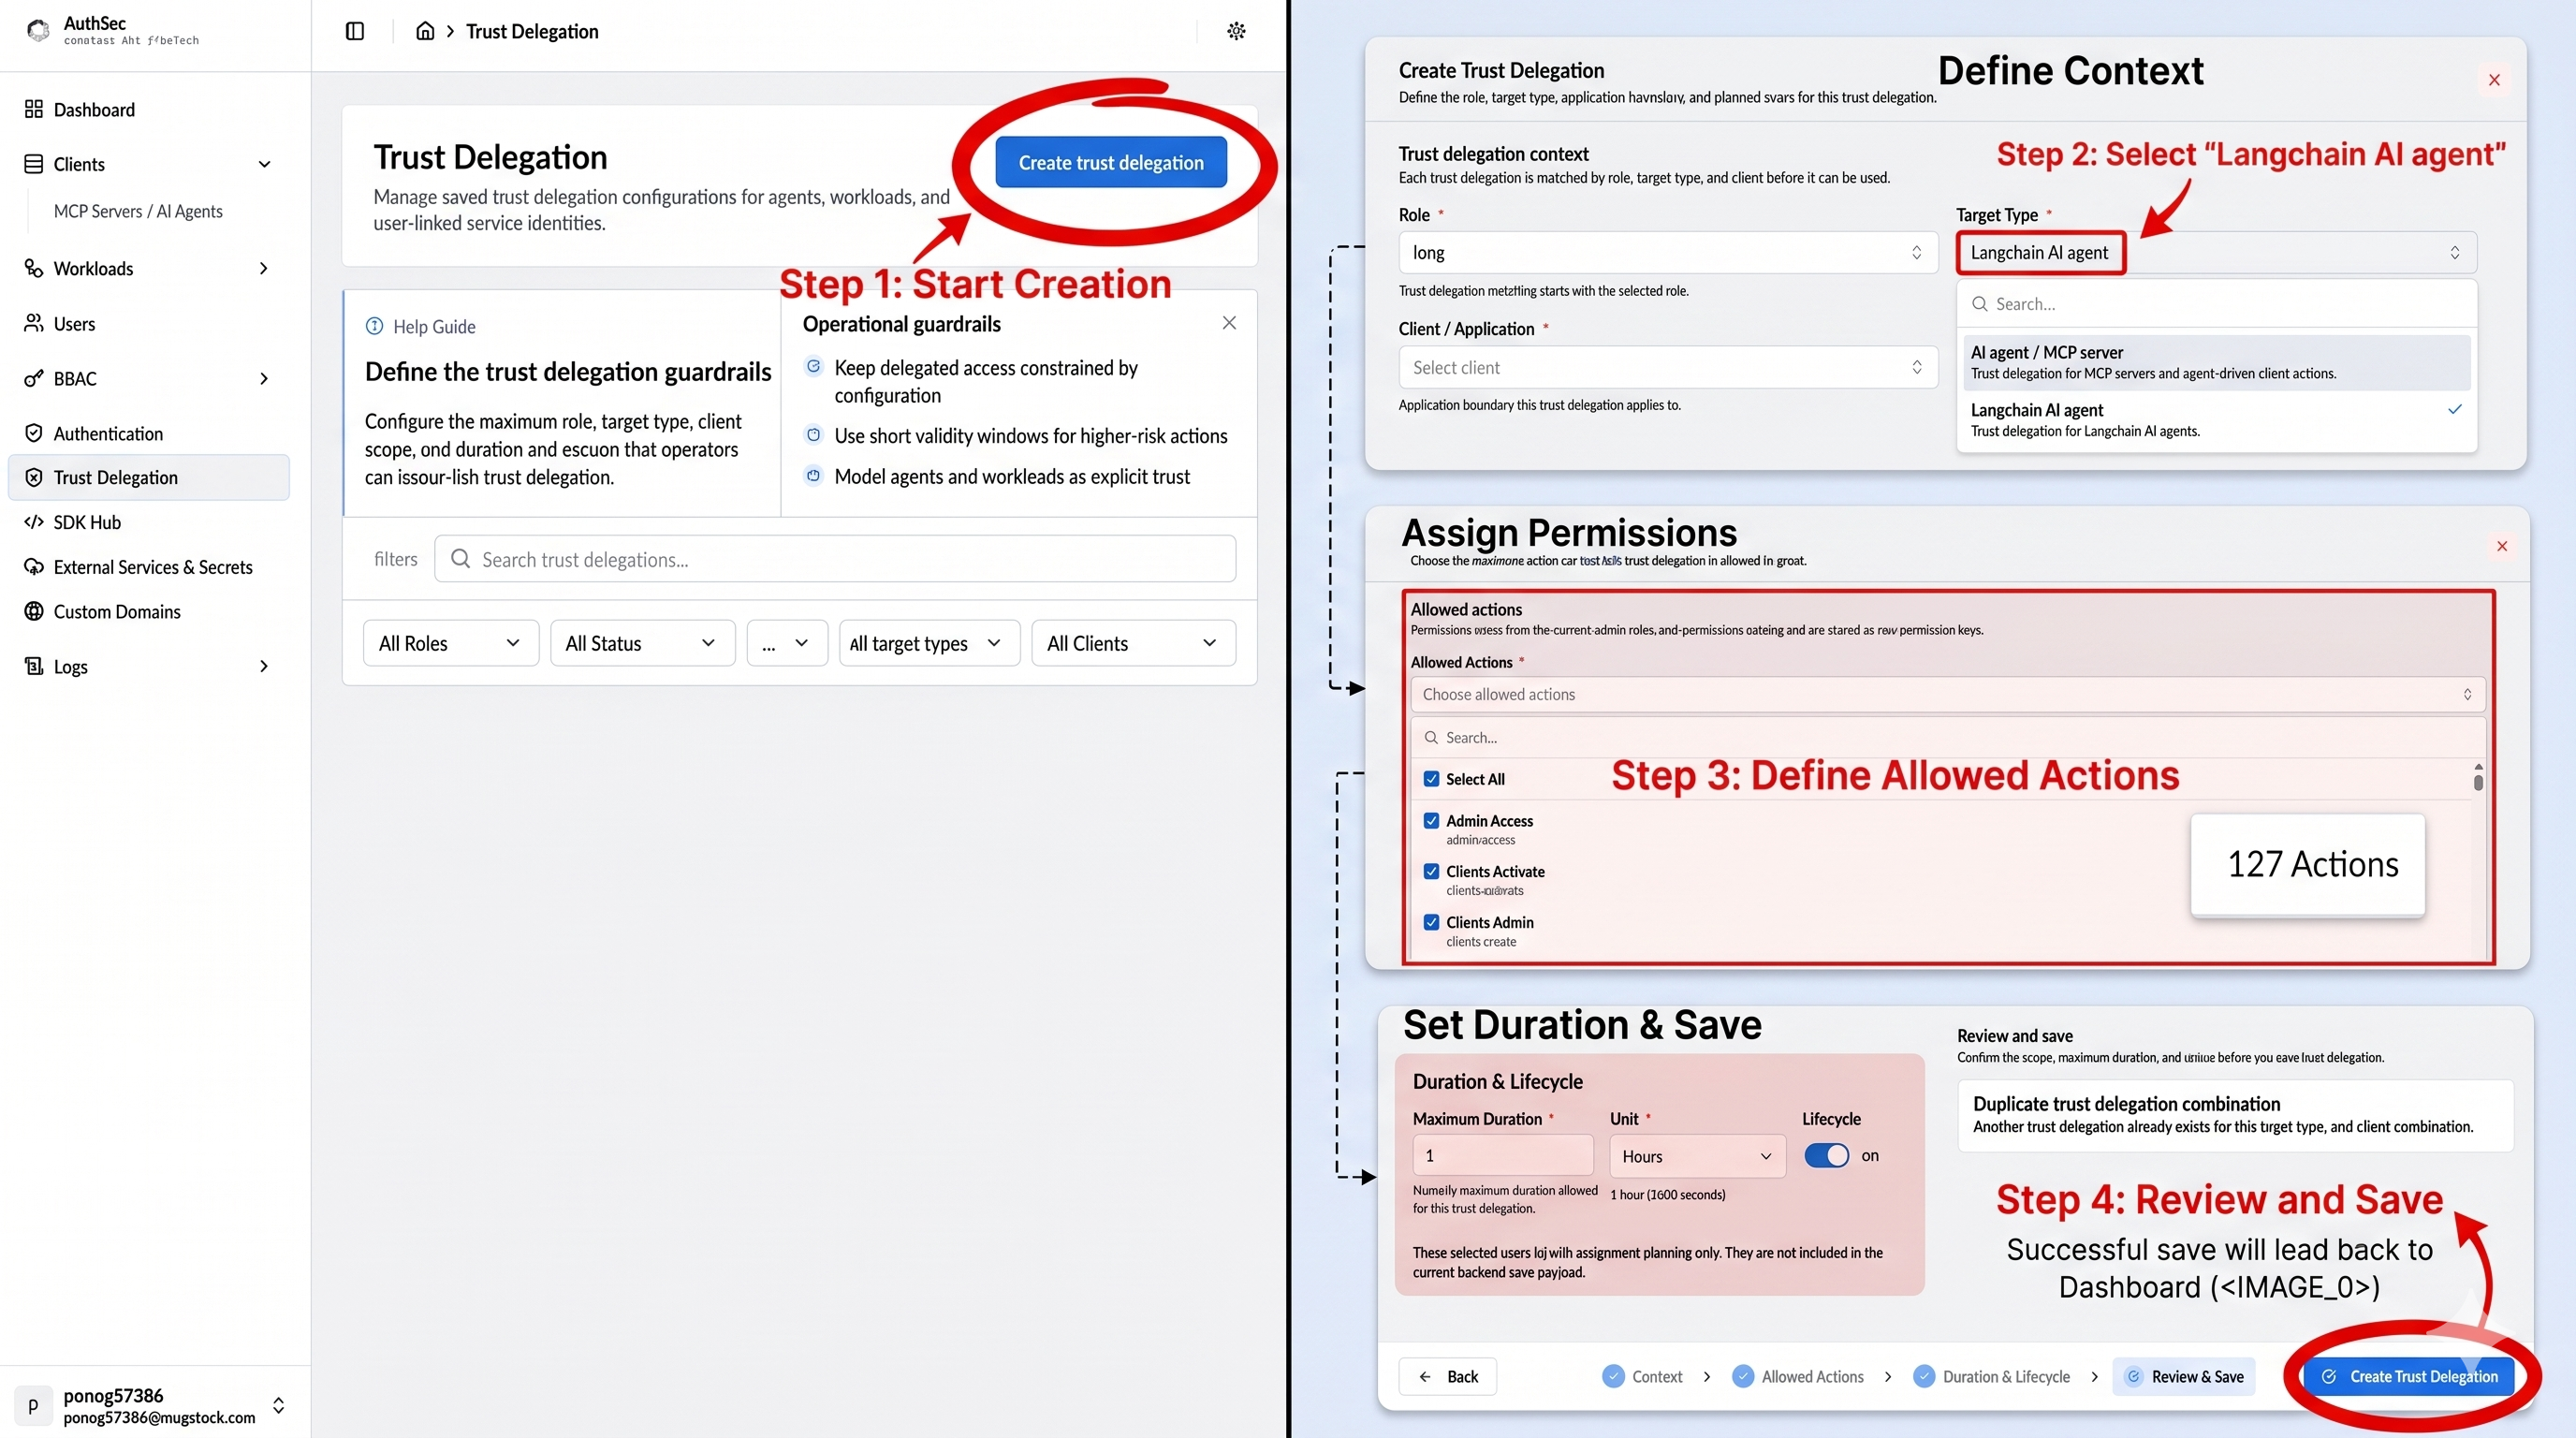
Step 3 — Install the SDK
pip install authsec-autogen
The package is on PyPI.
Verify:
python -c "from authsec_autogen import AuthSecClient; print('OK')"
Also install the required dependencies:
pip install "pyautogen>=0.2" "authsec-langchain-sdk" "requests"
Step 4 — Configure the client
import os
from authsec_autogen import AuthSecClient, AuthSecConfig

authsec = AuthSecClient(AuthSecConfig(
    base_url=os.environ["AUTHSEC_BASE_URL"],
    client_id=os.environ["AUTHSEC_AGENT_CLIENT_ID"],  # from Step 1
))
The client caches the delegation token internally and only hits the network on first call or after expiry.
Step 5 — Register a delegation function
Define a plain Python function that calls authsec.get_delegation_token() and passes the returned JWT as a Bearer token to your downstream API. Register it in the UserProxyAgent's function_map so the AssistantAgent can invoke it by name.
import os
import requests
import autogen

def fetch_secure_data(customer_id: str) -> dict:
    jwt_token = authsec.get_delegation_token()
    resp = requests.get(
        f"{os.environ['DOWNSTREAM_URL']}/customers/{customer_id}",
        headers={"Authorization": f"Bearer {jwt_token}"},
        timeout=5,
    )
    resp.raise_for_status()
    return resp.json()

assistant = autogen.AssistantAgent("assistant", llm_config={"config_list": [...]})
user_proxy = autogen.UserProxyAgent(
    "user_proxy",
    human_input_mode="NEVER",
    function_map={"fetch_secure_data": fetch_secure_data},
)
user_proxy.initiate_chat(assistant, message="Get data for customer 42.")
Step 6 — Run the smoke test
export AUTHSEC_BASE_URL="https://your-authsec-server"
export AUTHSEC_AGENT_CLIENT_ID="your-client-id"
python examples/smoke_local.py
On Windows (PowerShell):
$env:AUTHSEC_BASE_URL = "https://your-authsec-server"
$env:AUTHSEC_AGENT_CLIENT_ID = "your-client-id"
python examples/smoke_local.py
How the delegation token endpoint works
The SDK calls one endpoint under the hood:
| Method | Path |
|---|---|
GET | /authsec/uflow/sdk/delegation-token?client_id=<id> |
Response:
{ "token": "<RS256 JWT>", "expires_at": "2026-05-21T07:25:36Z" }
Set base_url to your AuthSec server root — the SDK appends /authsec/... automatically.